


The last tutorial had us finish up the flag room by detailing it. We're now ready to move outward. We'll begin by expanding and detailing two of the three passageways we began in an earlier tutorial.
Let us begin with the large, 'north' passage. This one will serve as the main entranceway for the enemy team, and so will be the largest of the three. First we're deleting our large caulk brush. This is the direction that our passage will take. I've decided that we're going to slope this one upwards, until it's level with our balcony entrance. In fact, the two will be joined by the time I'm through. Let's begin with the ramp, first.
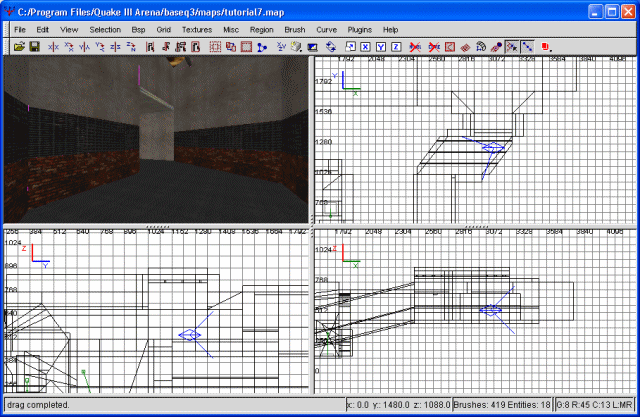
I'm going to keep the size of the passageway the same as it was previously. Since we've been doing nothing but making brushes and clipping since the start of this tutorial, I won't go into much detail. .I'm just going to continue the passage so that it basically matches the existing passage. For your edification, I'll throw in a screenshot.
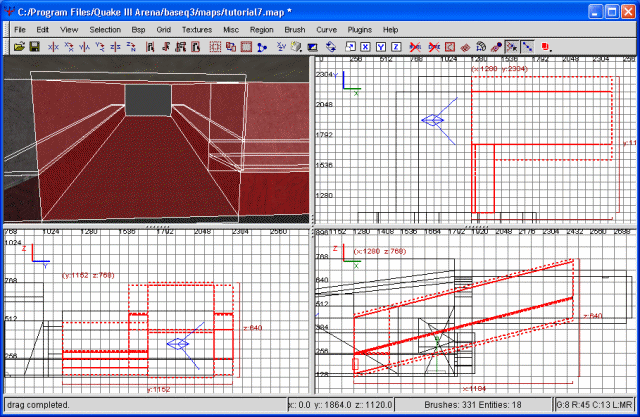
The ramp
Let's go ahead and leave this passageway for the time being. Instead, let's focus on the balcony. Eventually this will have two passageways leading off in either direction (one north, one south). Let's focus on the northbound passage.
As said earlier, I'm going to join the main entrance to the balcony entrance at some point. The easiest way, of course, would be to join them directly. However, this has several negative consequences.
For one, a straight passage doesn't block a player's visible view, thus increasing the complexity of a rendered scene. This, of course, drops framerate. The other reason is more tactical... if the passage were completely straight, a sniper standing at the junction could take out people in either direction. This would make a sniper far too powerful for this map. For these two reason, we're going to make the passage a bit more complex.
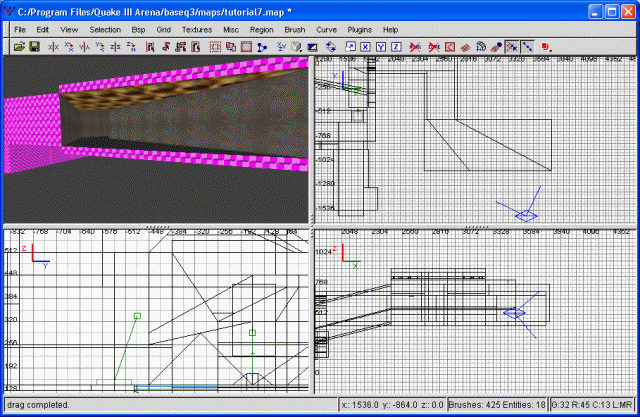
We'll being by deleting the caulk brush we used to plug the hole. Next, I'm going to draw out a straight, northbound passage for a fair distance. I'm extending it a bit more than halfway to the main passageway. A screenshot should help illustrate my point.
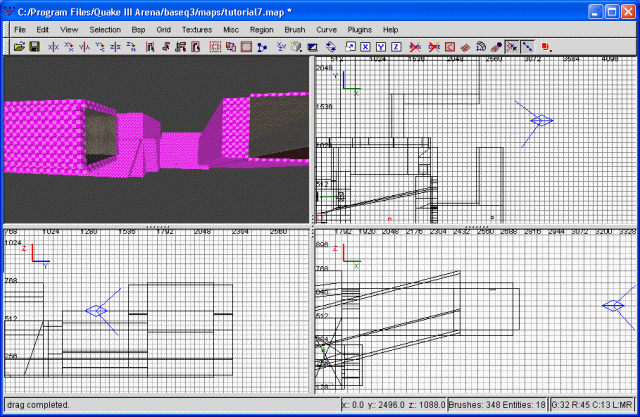
Northbound balcony hallway
From where the passageway ends, I'm going to deviate the path east by a small margine, then back north again. I've decided that I'm going to make this corner a bit more interesting. Rather than a boring, straight east-bound passageway, I've decided to add a bit of angle to the walls. This is a bit difficult to explain, so I'm going to just show a screenshot of what I did, minus the ceiling.
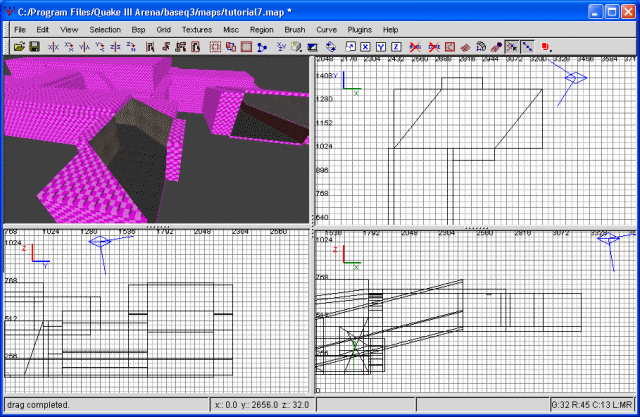
The deviation
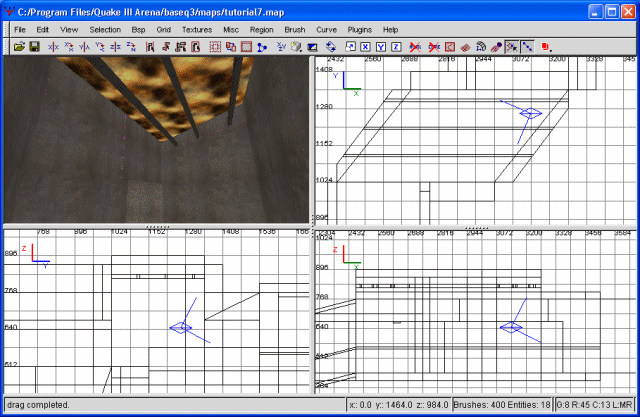
Now we're about at the point of joining the two corridors. You can do this however you'd like, but I'm going to leave my balcony passage alone for right now and extend the other, main passage some more. It's already at the correct level, so a simple (albeit large) corridor would the easiest method. What I'm doing, precisely, is drawing out just the floor of the main corridor. Using this as a guide, I'm then drawing the floor of the northbound balcony corridor until the two intersect. Without too much effort, this gives me a great guide on precisely how this intersection will appear. I'm not too keen on the perfect, right-angle meeting of the two, so I'm going to add some triangular portions to the side. These will give the corridor a more open appearance, as well as hopefully reducing the 'right-angle' appearance.

Meeting the two passages
With this done, I'm going to go ahead and fill in the walls and ceiling. The main passageway will still continue east, so rather than make a proper wall, I'm just going to plug the whole with another caulk brush. Once done with this, our map has regained integrity from the void, and I'm going to compile and check out this addition to our map.
Having done that, I'm immediately struck by how totally dark our 'deviation' is. Of course, there are no lights in it, so this is to be expected. Let's go ahead and make something a bit interesting while we can, then.
I'll begin by raising the ceiling by a fair amount in this area. Then, I'm going to fill in the now-open space with either new brushes, or by extending existing ones. With this finished, I'm retexturing the ceiling with a sky texture. The same one we used in the spawn room, actually. Following that, I'm going to put a few small crossbars, just for decoration. I'm texturing them with the base_trim/pewter_shiney. The top of this bar will never be viewable by players, since I'm putting it so close to the sky, so I'm texturing this caulk. The usual clipping and caulking of the side walls is also necessary.
Some light and detail for the deviation
After compiling and looking around, I came to the realization that this is still insufficient lighting for our purposes. Rather than get annoyed, I instead decided to clip out a small light strip out directly above the two entrances. I then textured it with base_light/light5_15k. There, that lit the area up nicely.
The walls in here are still pretty boring, so I'm going to spice it up a bit by doing some clipping and texturing. Rather than a single, boring texture adorning the entire 'deviant' wall, I've added several in layers. This same concept was used earlier in the spawn room, the flag room and the passages. It's an excellent way to make your level considerably more interesting, and it's quite easy to pull off. In this case, I decided to layer the bottom with gothic_wall/proto_brik, followed by base_wall/grill, and finally the concrete we started with.
The finished 'deviation'
Great, with that done, this side of the balcony entrance is finished. Now we're going to extend the other half. Why are we making two ways to get to the balcony entrance, you may ask. The reason is that, currently, all the d would have to do is position a gunner or sentry at the interection for the main and balcony entrances to effectively lock down both. That is unacceptable, and would inevitably lead to turtling. Another gunner at the water entrance would guarantee a locked-down flagroom.
With this in mind, we're going to begin by simply extending our T branch in the other direction. This is a rather simple process of just adding/extending the walls, ceiling and floor to go further outward. As such, I'm not going to supply a screenshot until we've added a few more things.
For the next leg of the hall, I'll be doing something vaguely similar to our deviation of before. This one, however, will considerably larger, which will result in more of a courtyard effect when we're done. To give you an idea of what I've done, here's a quick screenshot.
The beginning of a courtyard