With our last tutorial, our map has come significantly closer to completion. This tutorial covers creating the side entrance from midfield, as well as some general cleaning up and improvement of some of our existing areas.
We're starting with the side entrance to midfield. If you're following from the last tutorial, that's the one by our 'high' bridge that we refused to touch earlier. We're going to begin by deleting the whole thing, leaving only a hole to mid. On the courtyard side I've been a bit more lenient. At least in my case, I have a pretty complex set of brushes sealing the courtyard off from the void, so I'm leaving the last bit for now. I'll probably just recycle those brushes, rather than create them from scratch again.
We'll begin the passage at midfield. What I'm going to do is make it something of a sunken doorway. What I've done is clip up the floor plane to leave a whole for my slope. I've also lowered one of our side brushes to fill in the side. I realize this sounds pretty vague, so I'm going to drop a screenshot that will hopefully clarify.
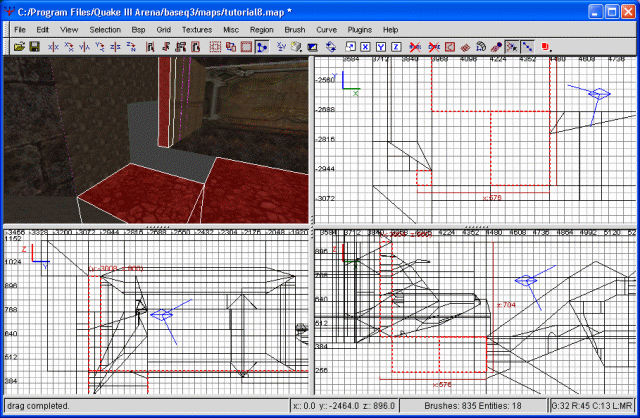
The side entance.
Next I'm going to draw out the ramp, followed by a short passage heading out. I'm also going to put some detail. Nothing too fancy, since midfield is already a tad on the complex side. Just enough to make the doorway stand out. On top of that, we're going to make a set of stairs, instead of just a ramp. Why? Well, why not?
Ignoring the detail for now, to make the stairs we need to begin by deleting our ramp brush. In its place, put a simple, square brush. We'll be clipping this to create our stairwell effect. Be sure to caulk the whole brush... you really don't want to come back later and try to caulk all the resulting brushes.
To start, our magic grid number is grid 16. This is number 5 on the numeric keypad. This is the magical gridnumber that people can walk across, without having to jump. All that making a stairway entails (basically) is to set radiant to the gridsize you want the stairs at, and then clip all the way across the brush at each gridline. Once that's done, delete the brushes you don't need until you're left with the stairs. Other people may have other methods, but this one works for me and is pretty easy (though labor intensive).
With that done, we can finish up the entrance. Rather than bore you with an extended lecture on how to make the detail and our short passageway, I'm just going to show you a screenshot.
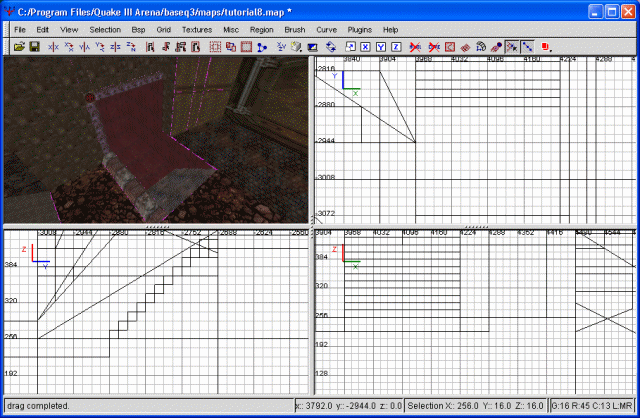
Stairs and Detail
Don't forget to cut the passage sides (bordering your stairs) to match the actual stairway. This way we can be sure no textures are being hidden. Though the process is, once again, time consuming, it's important to get into the habit of being exacting like this.
Once we've got this taken care of, let's make a right angle in our passage, heading in the direction of our courtyard entrance. I'm making the passage octagonal in shape, just because it's alot more interesting than the typical square passageway. I've done alot of detailing of this passage, both the entrance and the passageway itself. To show what all I accomplished, take a gander at the following screenshot.
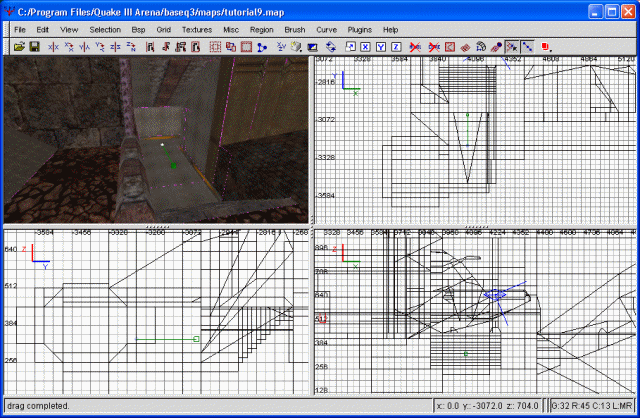
Fully detailed
Originally I was going to provide some in-game screenshots of what the results looked like, but it was at this point that Quake III decided to go stupid on me. All screenshots started coming out black. Instead, just download the map and look around if you have any questions.
With that out of the way, let's continue our passage. I'm making a door here, followed by a platform crossing and a very deep pit a la Star Wars. First the door rim and a brush as our bridge. Then I'm drawing a solid brush in the door opening and clipping it into four pieces, the cuts being diagonal through the center. A screenshot.
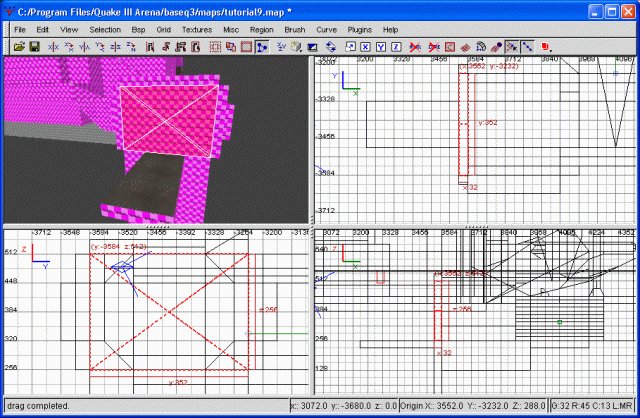
The start of our door
I then decorated these four sides as I would like the door to look. My eventual goal is to get all four peices to slide into their respective walls when someone approaches. With so many moving parts, there are alot of sides you'll need to texture. At this point, you may want to make a separate save, right before we actually convert it into a door. Then save it as the original file and compile it. If you notice any problems, you'll need to either revert to that extra save, or rebuild the door from scratch.
However, I'm getting slightly ahead of myself. Once you've created what you want the door to look like, highlight all of one side. For instance, I'm starting with the top quarter, so I'm highlighting every brush that will move up when the door opens. With them all selected, right click on the mapping area and choose func/func_door. Repeat this operation with the rest of the sides.
Once all the sides have been turned into func_doors, you'll need to go into the entity properties and make sure they slide in the correct direction. While you're in there, add another key for targetname. Each of the four sides should have the same targetname, ie sidedoor (which is what I'm using). The name itself doesn't really matter, but it's easier to keep things straight by naming them in a sensible manner.
Now draw a large brush in front of the door and texture it with the trigger textures (under common). This will trigger the door to open. Since there's four parts, and we don't want them opening except together, we're doing this trigger -> target setup. There'll be a similar one on the other side of the door so people can get out. With the brush created, right click in the graphing area and choose trigger/trigger_multiple. Then go to the properties window and enter a key of 'target' with a value of 'sidedoor'. Arrows should be pointing to all four segments now. If you clipped up your trigger brush to make it fit properly in your passageway (as I did) repeat these steps with the other triggers.
Now I'm going to compile the sucker to make sure it works. Remember that entities don't keep the void out, so we'll have to sketch a quick room around our door to keep from getting leak errors. Allow me to show you what I have created.
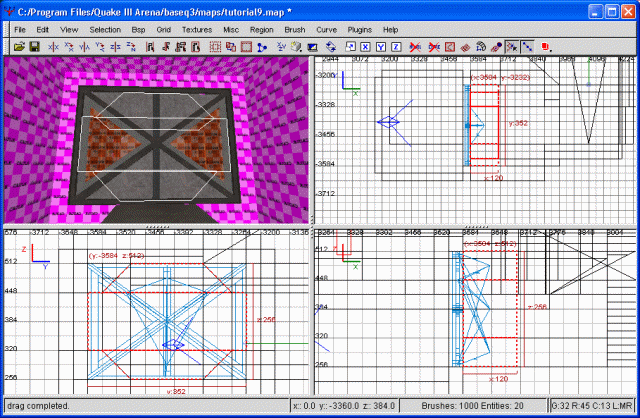
The door is looking pretty
I've highlighted the trigger brushes to make them easier to pick out. My door is traced in blue, as are all the arrows showing trigger -> target connections. Once compiled, I tested it out, and surprisingly enough everything was correct the first time. I'm so proud. Regardless, there are a few adjustments we need to make.
Firstly, I noticed that if you jump into the door fast enough, it doesn't open up. Instead, it make an opening sound repeatedly without opening. That appears to be a result of how I built the door... in this case, the person is stuck under part of the door. Rather than smash the person, the door doesn't open. To combat this, we could have put a noclip or weapclip in that space, but it's a bit late for that and I don't feel like rebuilding everything. So, I'm going to make the door open faster.
Go into the entity properties for each door and add a key of speed with a value of 1000. You can actually do all four at once (with any property all four share). We're also adding in a lip key, with a value of 16. This is how much of the door remains at the sides, and should add a neat effect. Lastly, we need to make a new trigger_multiple brush on the other side of the door so people can get out. Unfortuanetly, speeding up the doors didn't help the sticky door problem. The only way to truly fix the problem would be with the use of a noclip brush, so I'm going to have to bite the bullet and rebuild the door. Luckily I have the other saved map to revert to.
So, once all that's done again, we're compiling and testing once more. Thankfully, the door is now fully functional and no longer subject to jamming. As you can probably guess, trigger_multiple has alot of different uses. It can be used to trigger doors, elevators, shooters, and a whole slew of other things. We'll get into some more uses later on.


