


Now that we have a spawn room adequate to our purposes, we're going to make the flag room. At this point I'm assuming you have a fairly good understanding of brushes, the clipping tool, and textures. The remainder of the tutorials will continue with this assumption. As such, I will no longer remind you of precisely what we need to do to accomplish something. Instead we'll focus more on the actual construction and balancing of the maps, rather than the basics of brush and texture manipulation. If you feel you still need more practice, I recommend you reread the previous tutorials, or perhaps make a simple map of your own to hone your skills.
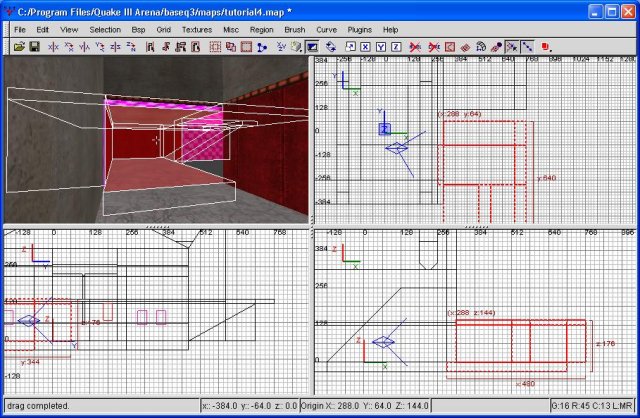
I'm going to start by deleting the two brushes that border our ramp. These are the bottom-most brushes, which we textured red. We'll be turning these into passageways that lead directly to our flag room.
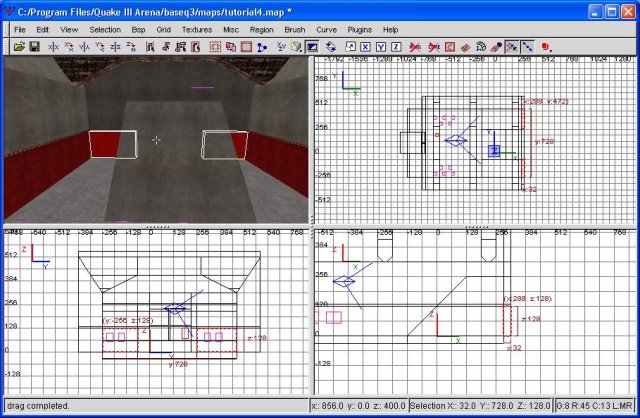
These are the brushes I'm killing
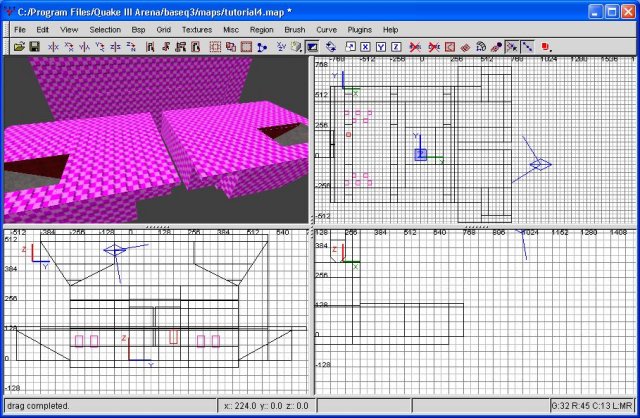
Following that, I'm going to make a tunnel that leads a bit out, followed by a ramp that leads up and out. I'll be doing this by making brushes for the floor, ceiling and walls. Then, I'll be making some more brushes to make a ramp heading up and away from the center of our map. I'm going to start with the "top" hallway.
In the least bit confusing? Allow me to take it step-by-step. First, I'll be making a hallway heading straight out. Since we have several brushes already in position, I simply lengthened some, while making others from scratch. Does it really matter? No. Here's a pic.
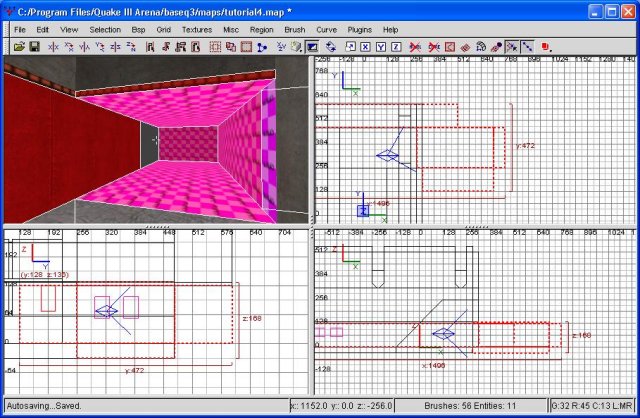
The hall
Next, I'm going to make a ramp heading facing "north", plus some walls to flank it.
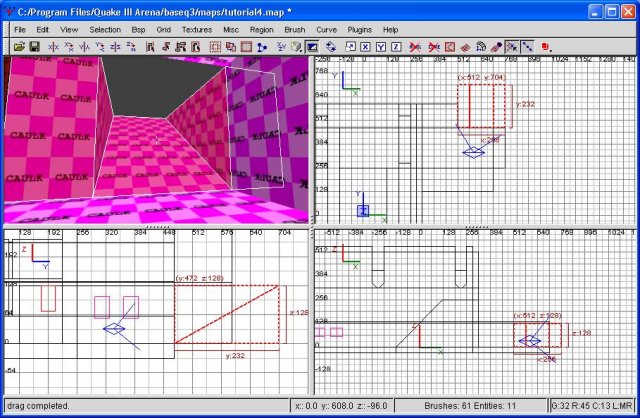
The ramp
Not so hard afterall, eh? Regardless, at this point we're going to continue onward. Next I'm going to draw a brush across our opening into the void. This will serve to define where you floor's going to lay. What I did was make this brush that extended a bit out in all directions (without overlapping into other brushes) and then cut it up with the clipping tool. Though not evident in this pic, I'm going to delete the center brush (the one that blocks the ramp).
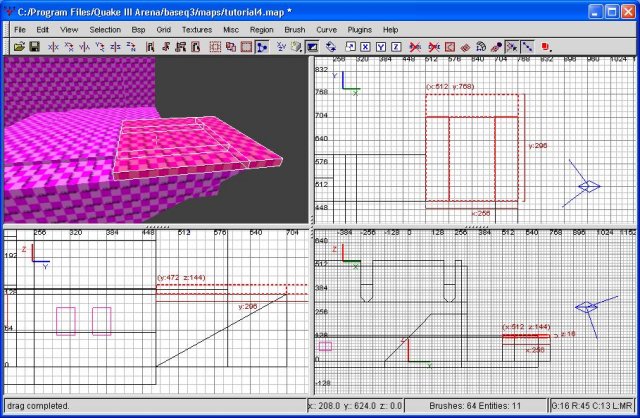
The floor
At this point I'm going to go ahead and start texturing my hallway. Make sure none of your textures overlap into space that will never be seen... I had to clip a brush in order to assure this didn't happen. Regardless, once the pink's gone from the inside of your tunnel, we'll continue.
In my case, I extended a brush out of the spawn room to serve as the ceiling of my passage (and the floor of my flag room). However, it's a bit too thin to match up with everything else, so I cut it and expanded it. I won't go into that in depth, since you wouldn't have the same problem if you'd simply made a new brush to begin with.
Now that we've defined what level our floor will occupy, I'm going to draw out brushes to even the floor out in a nice area around the exit we just made. A screenshot follows, showing what I did.

The expanded floor
As you can see, I have a rectangle with a perfectly even floor. Since we basically have this portion finished, I'm now going to highlight all the new brushes I made (ie, everything beyond our spawn room walls). I'm going to copy, then paste these brushes. Then I'm going to flip them around the Y axis. This option is under 'selection', then 'flip'. By doing this, I've now flipped our brushes around so they can line up correctly on the other hole we cut in our spawn room.
Our second spawn room entrance
You may have noticed not everything lines up right. Well, this is a snowball of the fact we didn't line everything up to the grid to begin with. Well, personally, I don't care. It only takes a bit of resizing to fix that. Additionally, I needed to draw a wall brush, since I decided not to clone the entire far wall. Once again, really no big deal. A few minutes of work, and our second entrance is fully functional.
The two entrances are done
I'm going to go ahead and texture our flag room floor now (what there is of it). Once that's been accomplished, I'm going to fill in the small floor gap between the two entrances and texture that, as well. In the process of doing this, I noticed that I had forgotten to texture a small wall portion. In turn, I had to clip this (and it's flipped companion) to avoid hiding textures behind brushes (where no one would ever see them).
Next we're going to complete the "back" wall of the flag room, the wall next to our spawn room. I kind of like the Y effect that our current configuration is giving us, so instead I'm just going to fill in the rest with a simple, rectangular brush. I'm also going to texture this new brush and anything visible from our pre-existing wall. This will require some clipping to keep from making non-visible textures. When I finished, I ended up with the following.

The back wall of the Flag Room
At this point I'd really like to get a look at what I've created, but unfortuanetly we're still leaking into the void considerably. There's a pretty easy way to fix that, though. However, if you're computer isn't a power machine, this may not work for you.
First, drag a huge brush around your entire level. Try to make it, more or less, fit just OUTSIDE what you've got drawn. Then, go to selection, CSG, and make hollow. This is a HORRIBLE way to make a room...the only reason I use it here is because it's quick and painless. Be sure to texture the inside with something so you don't have to deal with a massive HoM effect. A sky for the top would probably be a good idea, so you can have enough light to see what you've done.
Having done this, what problems do we have? Can we say, too freakin' dark? Excellent. I'm going to roll a few steps together here to try and improve the light disposition of our level. First, our passages.
Using the same method we used when we put the row of red lights in our spawn room, I'm going to put some more lights in our passageways. Basically, select the walls, then cut them twice horizontally. I think we've got enough red, though...I'm going to use some white lights. The texture I settled on is under base, the base_lights. In particular, light5_5k. The 5k means 5,000 (duh), which in turn, is half as bright as the 10k version and a third as bright as the 15k one. So, what the hell does that mean? Honestly, experiment with them. That's the only way you can truly get a feel for what they do.
As with our previous light textures, I had to use the surface inspector to rotate our light. I then tested it in quake, and once satisfied, textured the other side too. Following that, I decided to put some 'fullclip' brushes in those holes we have left over in the wall.

The flagroom, a bit improved
Alright, now let's decorate and light that wall a bit more. I'm going to draw a brush just slightly off from the wall. This will turn into a banner, so proportion it appropriately. Once you've proportioned it the way you like (you can always change it later), go to the common textures and select 'nodraw'. This makes it so the brush doesn't interfere with player movement. IE...any players (or bullets, or rockets, or rails) pass right through it as if it weren't there.
Next, select the face that's pointing outward. We're now going to go into the ctf texture group (ctf stand for 'capture the flag' if you hadn't figured that out yet). We'll be choosing ctf_redflag. Then, bring up the surface inspector and hit 'fit' (underneath the brush heading, not patch). This should make our texture fit onto the brush. Now I'm copying the flag over so there's two of them spread roughly even across the wall.
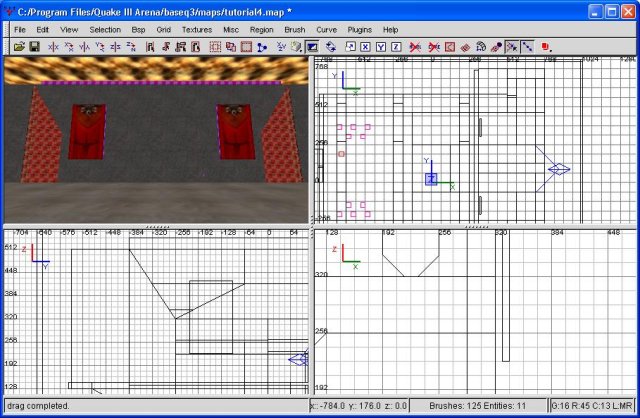
The flags