Without any further ado, let us begin. Open GTKRadiant (duh) and left click on the top right view window. This is the top view. Once it's selected, hit the insert key until you see '256' on the top and bottom. This number (256) is the grid number, and is very helpful in determining the general size of whatever it is you're making. In this case, we're going to start with the floor. Next, when you've accomplished that, press the number 6 on your numpad (number pad, right side of the keyboard). This will reset the grid size to '6', which is much easier to work with when we're making something this large.
Alright, now for the floor. Click and hold the mouse button at the -256,256 mark (top left of the window) and drag down to 256,-256. This should create a large square as depicted in the following picture.
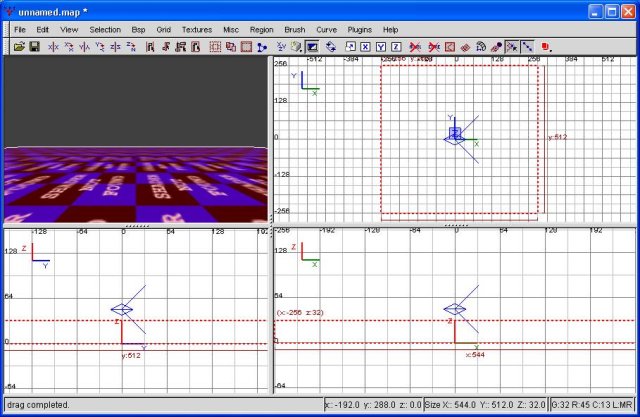
The floor
Congraultions, you just created your first brush. What is a brush? A brush is a surface inside quake3 arena levels. Basically, everything we're going to do here will revolve around brushes or entities. We'll get into entities later, but just know that if I'm talking about a brush, I'm talking about THIS. Now that you know what a brush is, let's move it some.
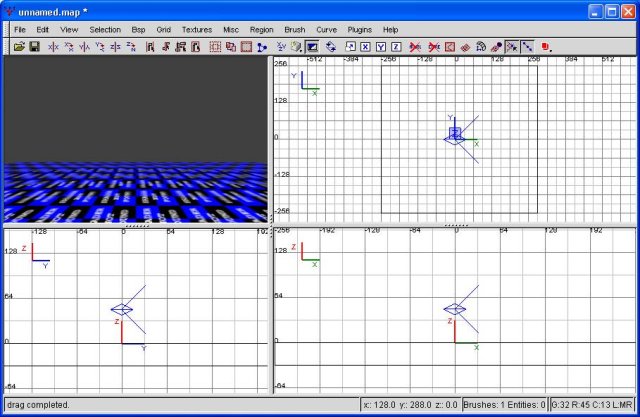
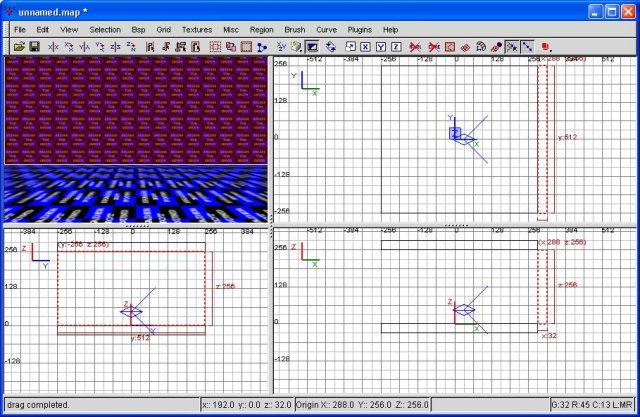
Click and hold your mouse button in the center of the brush, in the bottom left window. This is a side view. You could also do it in the bottom right window, which is the front, as we're just going to drag the brush down a bit. Now, drag it so that the top of the brush is even with the 0 line. The following pic will illustrate what I mean.

Moving the floor down a step
Does it have to be at the 0 mark? No. However, we're putting it here for the purpose of demonstrating the movement of brushes (very important) as well as making it easier on ourselves later.
Let's move on. Since we're making a perfectly square room, let's go to the ceiling next. Rather than drawing a new ceiling, let's just copy the floor and move it up, shall we? Alright... to copy, just hit control-c (ctrl-c from now on). This copies the currently selected brush(es). Now let's hit escape just for the heck of it. This will deselect everything, leaving you with a free-floating brush. Notice the red outlines turned to black, and the view window in the top left is no longer highlighting our floor.
The deselected floor
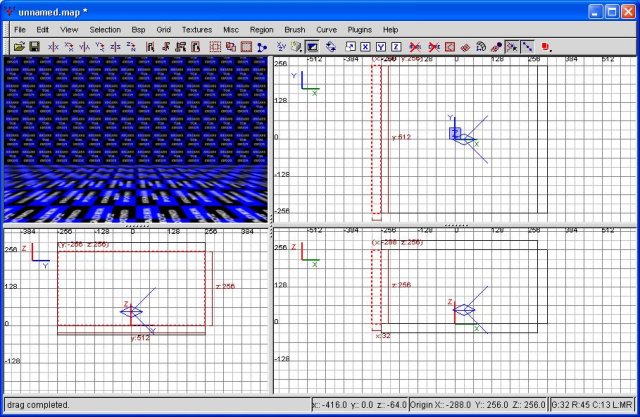
Now let's hit control-v (ctrl-v from now on). This is the paste command, and a new copy of the brush is pasted where you copied the original. It looks like you simply reselected the old brush, but this is not the case. To illustrate this, click in the middle of the selected area and drag up. Use either the side or front view for this... I'm using the side. If you'll notice, you'll now have two brushes of the same size. Now hit the insert key a couple times to zoom out of that window some (if necessary). We're going to put the bottom of this brush at the 256 grid mark.
What happens, you ask, if you inadvertantly hit escape and deselected your brush before you could copy? Simply hold control down and left click on that brush. This will reselect it, and you can keep following this tutorial.
Moving the ceiling to a height of 256
Alright. Hit escape when you're ready, and this will deselect the brush. Great... now for the walls.
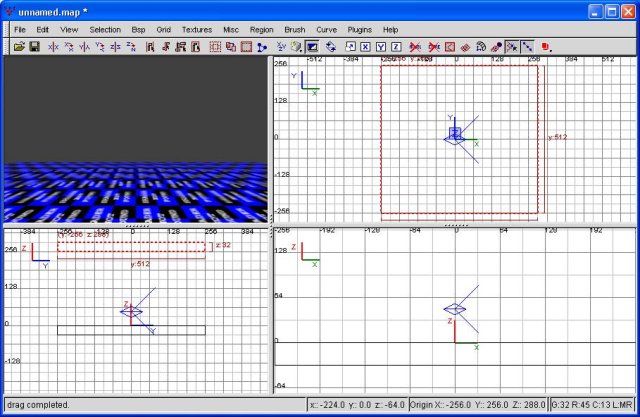
Back to the top view, we're going to draw a rectangle along the right side of the brushes. This will be our wall on this side. Once you have it drawn out, go ahead and zoom out your front view (bottom left window) so that you can see it. If you'll notice, the brush is only one grid square high, and extends from the 256 line up. This is, obviously, not going to work. So what do we do? First, let's drag it down a grid square. To refresh your memory, you must click within the brush and drag down one square. Allow me to demonstrate.
Making a wall
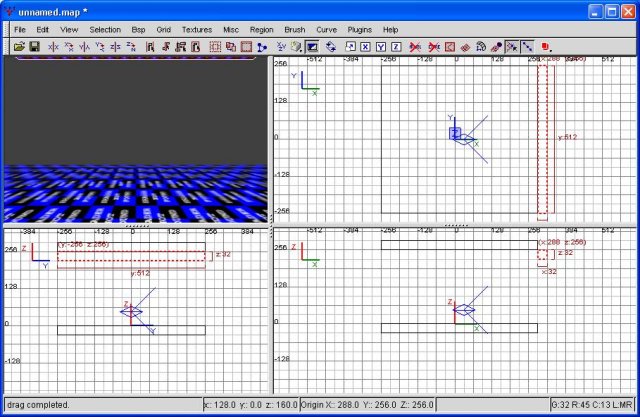
Alright, now that we've got it dragged down a step, click BELOW the brush, and drag down. This will resize the brush in this direction. We're going to pull it down until the bottom of the brush sits on the 0 grid line, as follows.
Making a wall that is a wall
Hey, great, we have a wall. Now that we have what we want on this side, let's use our copy/paste trick to make the opposing wall. Simply hit ctrl-c, then ctrl-v. This will create a duplicate copy of our wall. Then, using either the top or front view, drag that sucker so it borders the floor/ceiling brushes, as so.
Making the second wall
Great. Hit escape, and now we have the floor, the ceiling, and two walls. Two more walls to go. If you hadn't guessed, we're going to have to draw another wall in the top view. Go ahead and zoom it out some if need be (insert key, remember?) and then click and drag yourself a new wall. If you'll notice, it will actually be of correct dimensions, as new brushes mirror the last brush we made. Allow me to drop yet another screenshot for your amusement/edification.
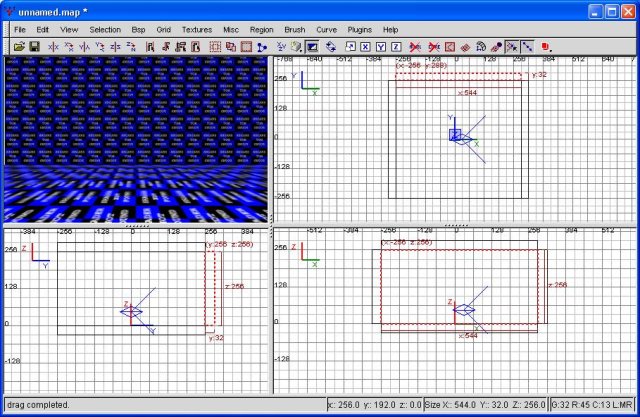
Making a third wall
Alright, outstanding. Assuming we've gotten this far, it's a simply matter of copy and paste, followed by a drag, to make our last wall complete. To recap one last time, with the wall selected, simply hit ctrl-c, then ctrl-v, then drag the brush to its proper place. We now have a box (our first room), with a floor, a ceiling, and four walls. Do you always have to have walls blocking your rooms off from the outside? Yes. Allow me to explain why.


